Photo Selection
A Wedding Photo Culling Workflow That Keeps Up
Culling is the part of a wedding workflow nobody hires you for and everybody feels when it is done badly: remove the frames that should never reach the client, break ties between near-duplicates, and keep the sequence of the day intact. A consistent, folder-by-folder pass — with AI taking the first look — turns a three-day job into an afternoon and hands the couple a gallery they can actually choose from.
By Smart Photo Selection TeamUpdated Published 4 min readIn Photo Selection
What culling is, and what it is not
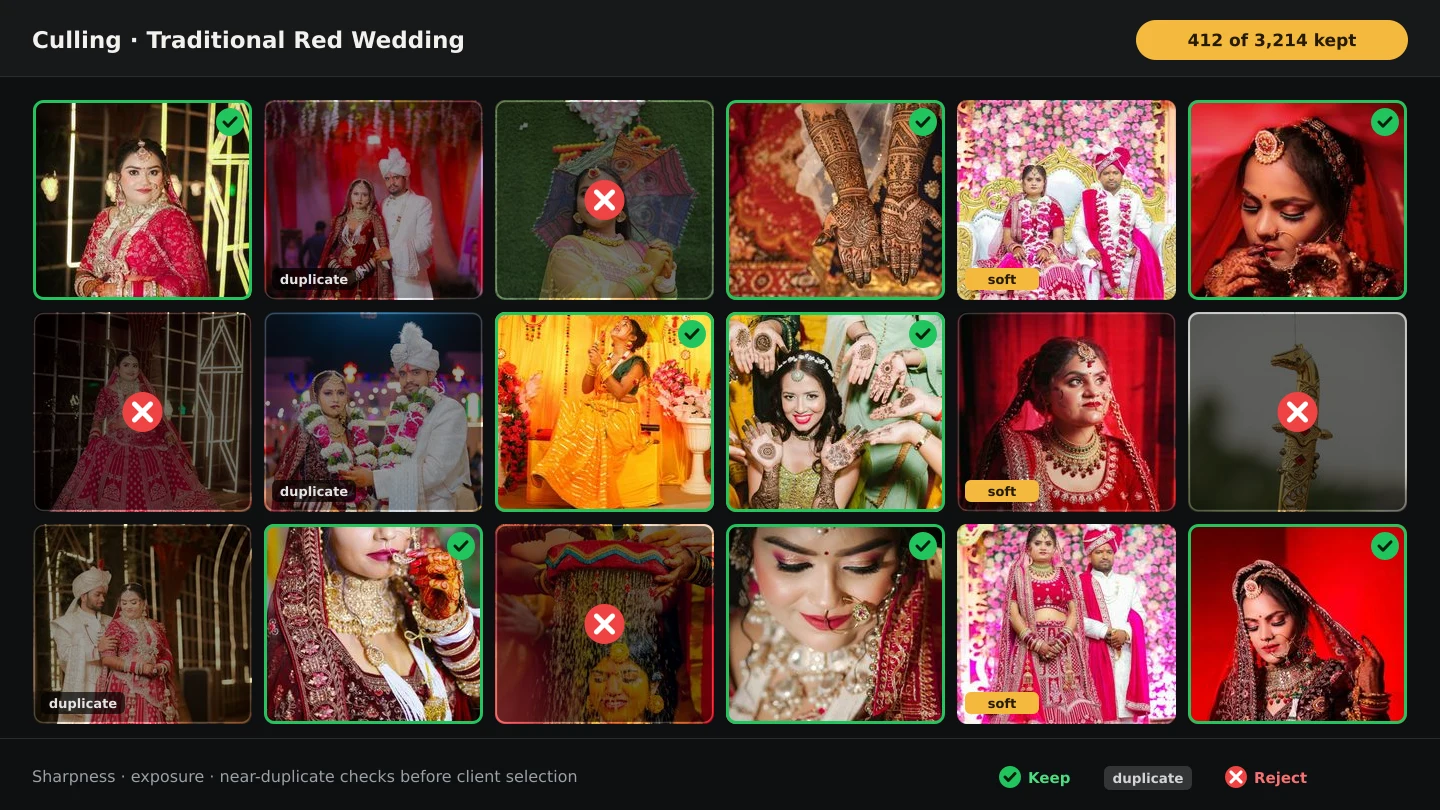
Culling is removal: missed focus, shutter shake, test shots, the accidental frame, and the second and third copy of a moment you already captured. It is not selection. Selection is somebody choosing what they want; culling is you making sure they never see what they should not have to. Confusing the two either leaves the client scrolling through rejects or hands you a gallery too thin to choose from. Do it as soon as the shoot is uploaded, while the day is still in your head — a cull the next morning remembers which room was which and which frame follows which, while a cull a month later reads as a sorting exercise.
The workflow
- 1
Upload into folders
One folder per function — haldi, mehendi, ceremony, reception — so the cull moves in the order of the day.
- 2
First pass: rejects only
Remove frames that are unusable or belong to nobody. Do not start comparing similar frames yet.
- 3
Second pass: duplicates and story
Break ties between near-identical frames, then check that each folder still reads as a sequence.
- 4
Hand over
Share the gallery link so the couple can mark favourites and submit their selection.
First pass: remove the rejects
- Out-of-focus frames where the intended subject is soft.
- Shutter shake and camera movement in low light.
- Flash misfires, test frames and monitor shots.
- Burst frames that are duplicates rather than a sequence.
- Frames you would not want the client to see at all, however the moment was captured.
Second pass: near-duplicates and sequence
This is where judgment lives. Three frames of the first look: one has eyes closed, one is sharp, one is sharper but flatter. Keep the one that reads best, not necessarily the technically best. Then walk the folder in order and make sure the sequence still tells what happened — a cull that removes every in-between frame leaves a gallery of highlights with no connective tissue.
Use AI for the first look
In Smart Photo Selection, AI-assisted culling sets aside blurry and duplicate frames before you open the folder, which is exactly what the first pass is: mechanical, repetitive, and slow by eye. Scores for sharpness, exposure and faces give you a reason to look twice, not a reason to delete. The AI photo selection post covers where the scores help and where they mislead.
Culling is not selection
| Culling | Client selection | |
|---|---|---|
| Who | Photographer | Client |
| Decides | Which frames are usable and presentable | Which photos they want to keep |
| Output | A clean gallery | A submitted, locked set |
| Risk if skipped | Client sees rejects and loses confidence | You guess what they wanted and design twice |
The couple then works through the culled gallery folder by folder, marks favourites and submits. From that point the set is locked and you download it as a ZIP — the start of editing, delivery and the album. See the client photo selection workflow for the client's side.
photo cullingworkflowwedding photographyphoto selection
Frequently Asked Questions
How many photos should be left after a wedding cull?
There is no fixed number. It depends on the length of the event, the number of photographers and what the client needs — enough that every moment is covered, few enough that they can look through all of it.
Should I cull before or after editing?
Cull first. Editing frames that will be deleted is the single biggest waste of time in a wedding workflow.
Can I cull on a phone?
The gallery lets you preview photos full size and delete before the client starts selecting, but a large cull is faster on a larger screen where you can see focus and exposure properly.
What happens to deleted photos?
They are removed from the booking, so they never appear in the client gallery or the face scan. Keep your RAW archive as the long-term backup.
How does culling connect to the album?
The couple selects from the culled gallery, and that submitted set becomes the starting point for the album. Fewer rejects upstream means fewer arguments about a photo that should not be in the book.
Related Articles
- How to Select the Best Wedding Photos FasterA practical method for choosing the best photos from a large wedding shoot: two passes, folders per function, AI help and a locked client choice.
- AI Photo Selection for Wedding PhotographersWhat AI photo selection does with sharpness, exposure, faces and duplicates, and how to use it on a wedding shoot without losing the moments that matter.
- The Client Photo Selection Workflow, Start to FinishHow client photo selection works online: share a gallery, let the client mark favourites, lock the set on submission and download exactly what they chose.
- Photo Selection vs Photo Culling: What's the Difference?Culling removes rejects on your computer; selection collects the client's decision online. What each step does, who it serves, and the order that works.
Step-by-Step Guides
- How to Cull Photos Before SelectionCull the raw shoot in Smart Photo Selection: review folders at full size, remove blinks, blurs and test frames, and keep the client's view clean before selection.
- How to Upload and Organize Event PhotosUpload a full wedding shoot into Smart Photo Selection, keep one folder per function, recover failed uploads and check the gallery is organised before you cull.
- How to Select Photos Manually in Smart Photo SelectionChoose photos by hand in the Smart Photo Selection gallery: folder tabs, the Selected and Not Selected filters, full-size preview, Select All and saving the selection.
- How to Use AI Photo SelectionRun AI Photo Selection in Smart Photo Selection: set how many photos the album needs, rank the shoot by sharpness, exposure and faces, then adjust the shortlist by hand.
Related Features
Design Your Next Album in Smart Photo Selection
Generate spreads from a booking's photos, refine them in the layer-based editor and export print-ready files.