Smart Photo Selection guide
How to Cull Photos Before Selection
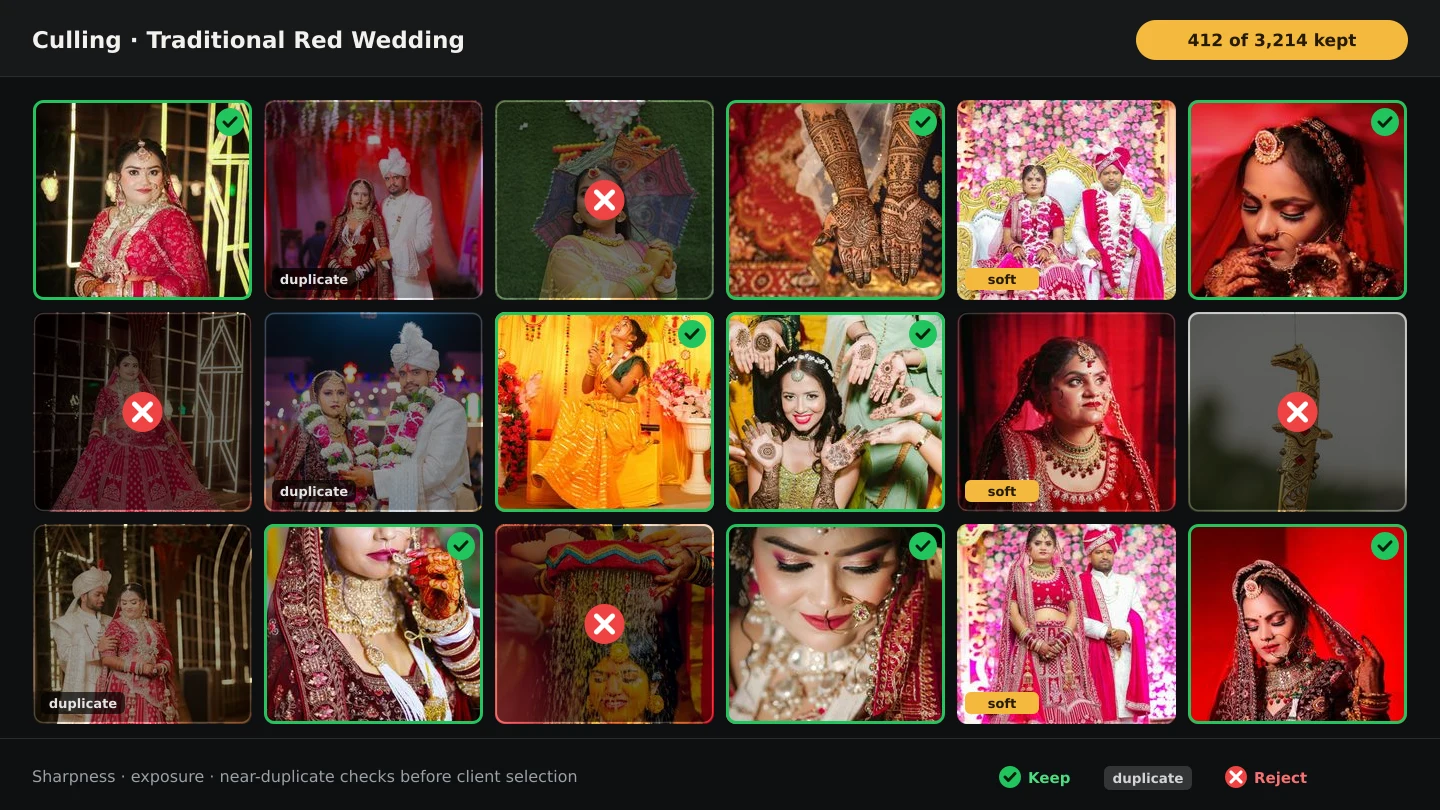
Cull the raw shoot in Smart Photo Selection: review folders at full size, remove blinks, blurs and test frames, and keep the client's view clean before selection.
By Smart Photo Selection TeamUpdated Published 4 min read
Short answer
Open the booking's gallery, go folder by folder with the All, Selected and Not Selected tabs, and preview every frame full size. Stage the frames that should never go out by clicking their cards, then click Delete (N) and confirm Delete Selected Images?. Nothing is removed automatically — photos disappear only when you delete them — and once they are gone the client never sees them in the gallery.
What You Need
- The shoot already uploaded with one folder per function, so each pass covers one part of the day.
- A photographer account with delete rights: admins can delete before the booking is submitted, super admins any time.
- A full-size preview you can trust — cull at 100%, not from thumbnails alone.
What culling is for
Culling is the first pass over the raw shoot: missed focus, blinks, test frames, half-lit hands and bursts of near-identical shots leave before anyone else sees the gallery. It is a different job from selection — culling removes frames that are unusable, selection chooses among the usable ones. Doing it first shortens everything after it: fewer frames to preview, fewer for the client to mark, fewer for the album's photo picker to load, and a smaller set for AI Photo Selection to score.
Step by step: cull a folder at a time
- 1
Open one function of the day
Click a folder tab — haldi (412), ceremony (840), reception (655) — instead of
All (N). One folder per pass keeps the review honest and the counts comparable. - 2
Preview full size
Click the image on a card to open the preview and step through the frames. Check sharpness, expression and what is happening at the edges of the frame; a thumbnail hides all three.
- 3
Stage what must go
Click the card (or its top-left circle) to stage the rejects — a check mark appears in the corner. Work through the folder, then check the counter.
- 4
Delete the staged frames
Click
Delete (N)in the toolbar (under the three-dotMore optionsmenu on a phone). Confirm in Delete Selected Images? — This action cannot be undone — and wait for Deleting images... to finish. The toast reports how many were deleted. - 5
Audit with the filters
Switch to
Not Selectedto see what is left out of the chosen set, and toSelectedto see the keepers. If a frame you meant to keep is missing, it was deleted — check the remaining count against your folder's original total. - 6
Repeat for the next folder
Move to the next tab only when the current folder's counts and previews look right. The same folders feed client selection and the album's photo picker.
Using the AI scores as a first-pass flag
If you want the weak frames surfaced rather than hunted, run AI photo selection on a folder and read the reasons beside each score: blurry / out of focus, softer than the rest, too dark, blown highlights and similar to … for burst twins. Those are the frames to preview and usually delete. The score is a hint, not a verdict — a deliberately dark reception frame still belongs in the book if the moment does.
| Pass | Question it answers | Where it happens |
|---|---|---|
| Culling | Is this frame usable at all? | Gallery — preview, stage, Delete (N) |
| Selection | Does this frame belong in the chosen set? | Gallery — stage, Done (N), Submit (N) |
| Album pick | Does this moment belong in the book? | Album Studio photo picker — Select shown, Select all in folder |
Tips
- Cull in the same order the day ran: one folder at a time, in sequence, so story gaps are obvious.
- Delete bursts down to one or two frames now — near-duplicates take slots from other moments later.
- Keep anything the couple asked for by name even if it is imperfect; note it instead of deleting it.
- Do the cull before the client gets the link: a clean gallery is also a faster gallery to review on a phone.
Common Mistakes
Culling after the client has the link
Submission locks uploads and deletes for admins. Cull before you send the gallery, while
Delete (N)still works.Judging from thumbnails
A frame that looks sharp at 132 px can be soft at full size. Open the preview for anything you are unsure about.
Deleting an entire filter view at once
Select Allstages everything currently visible. Make sure the folder tab and filter are the ones you mean before you press it.Skipping the burst twins
Near-identical frames both waste the client's time and compete for album slots — the AI marks them
similar to …, but only you can decide which one to keep.
Frequently Asked Questions
Does deleting photos affect the album?
Album projects reference photos in the booking. Delete frames before you build the album, so nothing you have already placed disappears from its picker.
Can a client see photos I culled?
No. Deleted photos are gone from the gallery, so they never appear in the client's view, in downloads or in Face Scan results.
Who can delete photos?
Photographer admins before submission, and super admins at any time. After an admin submits, the gallery keeps uploads and deletions locked.
What should I keep that people often delete?
Ceremony details, group formations and the in-between frames of the rituals — they are what the couple notices missing. See culling workflow for a fuller checklist.
Related Guides
- How to Upload and Organize Event PhotosUpload a full wedding shoot into Smart Photo Selection, keep one folder per function, recover failed uploads and check the gallery is organised before you cull.
- How to Select Photos Manually in Smart Photo SelectionChoose photos by hand in the Smart Photo Selection gallery: folder tabs, the Selected and Not Selected filters, full-size preview, Select All and saving the selection.
- How to Use AI Photo SelectionRun AI Photo Selection in Smart Photo Selection: set how many photos the album needs, rank the shoot by sharpness, exposure and faces, then adjust the shortlist by hand.
- How to Send Photos to Clients for SelectionHand a gallery to the couple for photo selection: share the link or QR, let them mark frames with Done, then submit so the agreed set is locked for delivery.
Related Features
Further Reading
- A Wedding Photo Culling Workflow That Keeps UpA repeatable culling workflow for wedding photographers: remove rejects, break ties between near-duplicates and hand a clean gallery to the couple.
- How to Select the Best Wedding Photos FasterA practical method for choosing the best photos from a large wedding shoot: two passes, folders per function, AI help and a locked client choice.
- AI Photo Selection for Wedding PhotographersWhat AI photo selection does with sharpness, exposure, faces and duplicates, and how to use it on a wedding shoot without losing the moments that matter.
Try It in Smart Photo Selection
Open Album Studio with a photographer account, pick a booking and follow the steps above on your own photos.