Smart Photo Selection guide
How to Select Photos Manually in Smart Photo Selection
Choose photos by hand in the Smart Photo Selection gallery: folder tabs, the Selected and Not Selected filters, full-size preview, Select All and saving the selection.
By Smart Photo Selection TeamUpdated Published 4 min read
Short answer
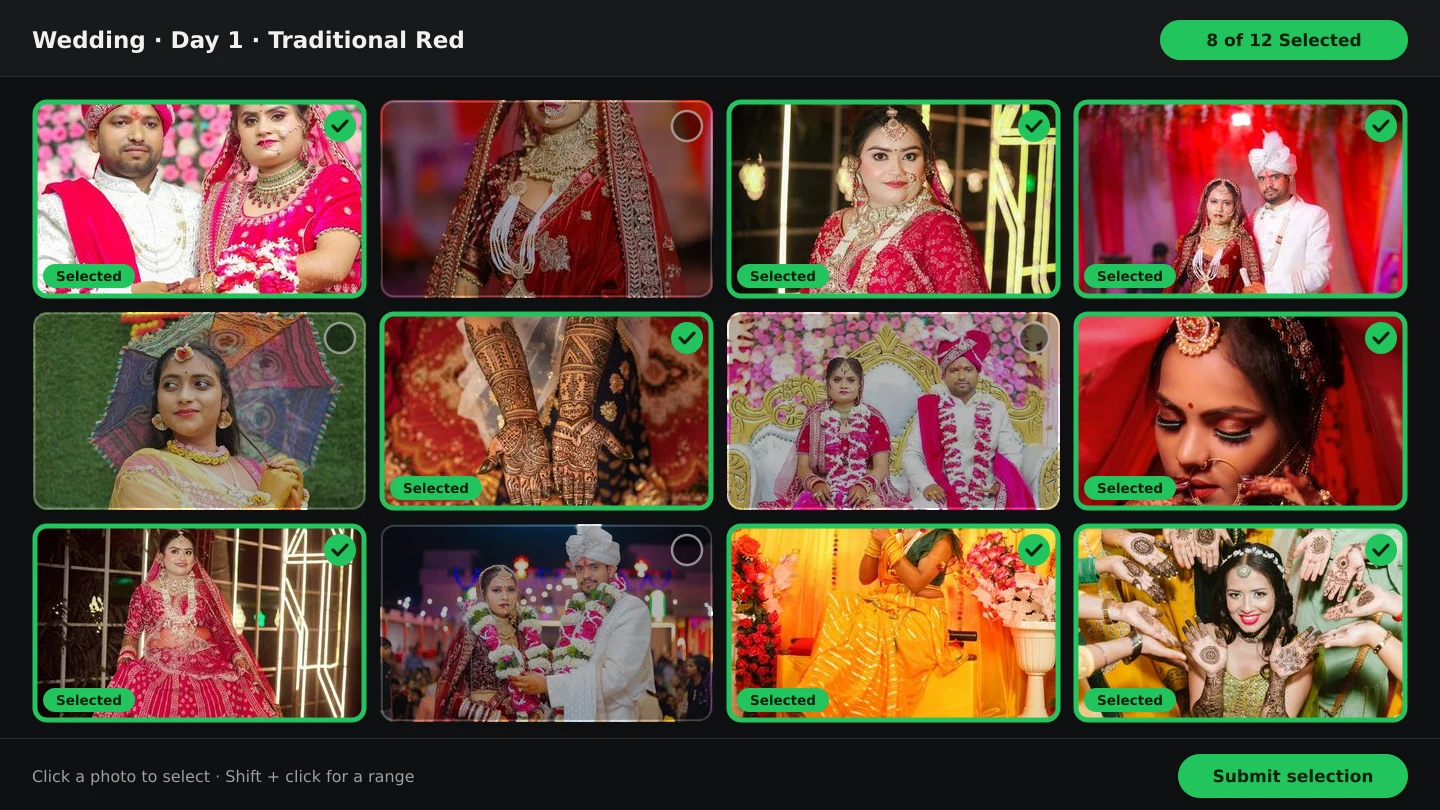
Open the booking's gallery and work folder by folder with the All, Selected and Not Selected tabs. Click a photo to open it full size, click the circle in its top-left corner to stage it, and press Done (N) at the bottom to save — the card then shows a green Selected badge. Use Select All and Unselect All for whole views, and the Selected / Not Selected filters to check the set you have kept.
What You Need
- A booking with photos already uploaded, and the gallery link (or the
Booking Imagescard on the booking). - Selection rights: photographers can stage photos before submission, clients before they submit.
- A desktop or phone browser — the same gallery works on both, with the actions in a three-dot menu on mobile.
What manual selection means here
Manual selection is the pass you make by eye: you preview frames full size, judge expression and sharpness yourself, and keep the ones you want. Smart Photo Selection shows the status on every card — a green border and a Selected badge for kept frames, red and Not Selected for the rest — so the set is visible as you go. Nothing is removed from the booking when you deselect a frame; deselected photos stay in the gallery and simply fall outside the chosen set. This is the hand route; AI photo selection is the assisted one, and both end at the same place.
Step by step: choose the keepers by hand
- 1
Open the gallery folder by folder
Use the folder tabs —
All (N),Without Folder (N)and one per function — so you review haldi, ceremony and reception separately instead of scrolling 3,000 frames in one list. - 2
Preview at full size
Click a photo's image to open it in the preview. Check focus, blinks and expression at full resolution before deciding; the studio watermark and the per-image download button stay on the card.
- 3
Stage the frames you want
Click the photo card (or the circle in its top-left corner) to stage it — a check mark appears. Keep clicking to build the set; the counter under the toolbar tells you how many are staged.
- 4
Save the selection
Press
Done (N)in the bar at the bottom;Cancelclears the staging instead. The saved frames flip to a greenSelectedbadge and a green border, and the toast confirms Images updated. Tapping an already selected photo and pressingDoneputs it back toNot Selected. - 5
Use Select All and Unselect All
Select Allstages every photo in the current view andUnselect Allclears it — handy when you have filtered to one folder or toNot Selectedand want to act on the whole view at once. - 6
Audit the result with the filters
Switch between
All,SelectedandNot Selected. TheNot Selectedview is where rejected frames collect; theSelectedview is the set that will be submitted, downloaded or used for the album.
Manual selection versus AI photo selection
| Route | Best for | What you do |
|---|---|---|
| Manual selection | Small shoots, or frames you already know | Preview, stage, Done (N), audit with the filters |
| AI photo selection | Large shoots where a first ranking helps | Set Photos in the album, click Run AI selection, then adjust with Earlier, Later, Replace and Remove |
Both routes feed the same downstream steps: the client confirms the set, the gallery delivers it, and the album picks from it. If you cull first, the manual pass gets much shorter — see culling before selection.
Tips
- Work in the
Not Selectedfilter after a pass: it is faster to spot a frame you meant to keep among the rejects. - Preview before staging anything. A thumbnail hides soft focus and closed eyes that the full-size view shows immediately.
- Stage one function at a time and save with
Done (N)before switching folders, so a stray tap cannot undo a finished folder. - Check the
Selectedfilter before submitting — it is the exact list the client or the album will see.
Common Mistakes
Assuming deselecting deletes the photo
Deselected frames stay in the gallery. Only the
Delete (N)button with its Delete Selected Images? confirmation removes files, and that cannot be undone.Selecting from thumbnails only
Open the frame full size first. Blinks, half-sharp eyes and stray guests only show at full resolution.
Staging hundreds of frames without saving
Press
Done (N)as you go. The staging is local until you save, so closing the page loses it.Ignoring the folder tabs
Without folders,
Select Allacts on everything at once. Filter to a folder so a whole view means one function of the day.
Frequently Asked Questions
Can I undo a saved selection?
Yes. Tap the frames again so they stage, then press Done (N); a selected photo toggles back to Not Selected. Until the booking is submitted, the set stays editable.
What happens after the client submits?
The set is locked — photos can no longer be selected, uploaded or deleted by mistake, and the client sees Your booking has been submitted. A super admin can still change the selection.
Does manual selection work on a phone?
Yes. The filters, selection and submit actions move into the three-dot More options menu on small screens, and the Done (N) bar sits at the bottom of the screen.
How is this different from choosing album photos?
Gallery selection is the agreed set with the client. Choosing photos for the album is a second, smaller cull from that set — see choose photos for an album.
Related Guides
- How to Use AI Photo SelectionRun AI Photo Selection in Smart Photo Selection: set how many photos the album needs, rank the shoot by sharpness, exposure and faces, then adjust the shortlist by hand.
- How to Cull Photos Before SelectionCull the raw shoot in Smart Photo Selection: review folders at full size, remove blinks, blurs and test frames, and keep the client's view clean before selection.
- How to Send Photos to Clients for SelectionHand a gallery to the couple for photo selection: share the link or QR, let them mark frames with Done, then submit so the agreed set is locked for delivery.
- How to Choose Photos for an AlbumPick the photos that go into the book: use client picks and folder filters in Album Studio's photo picker, and decide how many frames a sheet can hold.
Related Features
Further Reading
- How to Select the Best Wedding Photos FasterA practical method for choosing the best photos from a large wedding shoot: two passes, folders per function, AI help and a locked client choice.
- The Client Photo Selection Workflow, Start to FinishHow client photo selection works online: share a gallery, let the client mark favourites, lock the set on submission and download exactly what they chose.
- AI Photo Selection for Wedding PhotographersWhat AI photo selection does with sharpness, exposure, faces and duplicates, and how to use it on a wedding shoot without losing the moments that matter.
Try It in Smart Photo Selection
Open Album Studio with a photographer account, pick a booking and follow the steps above on your own photos.