Smart Photo Selection guide
How to Map Photos to Template Slots
Place every chosen photo into the right frame: how the mapping step fills slots in album order, swaps and replaces frames, and catches low-resolution photos.
By Smart Photo Selection TeamUpdated Published 4 min read
Short answer
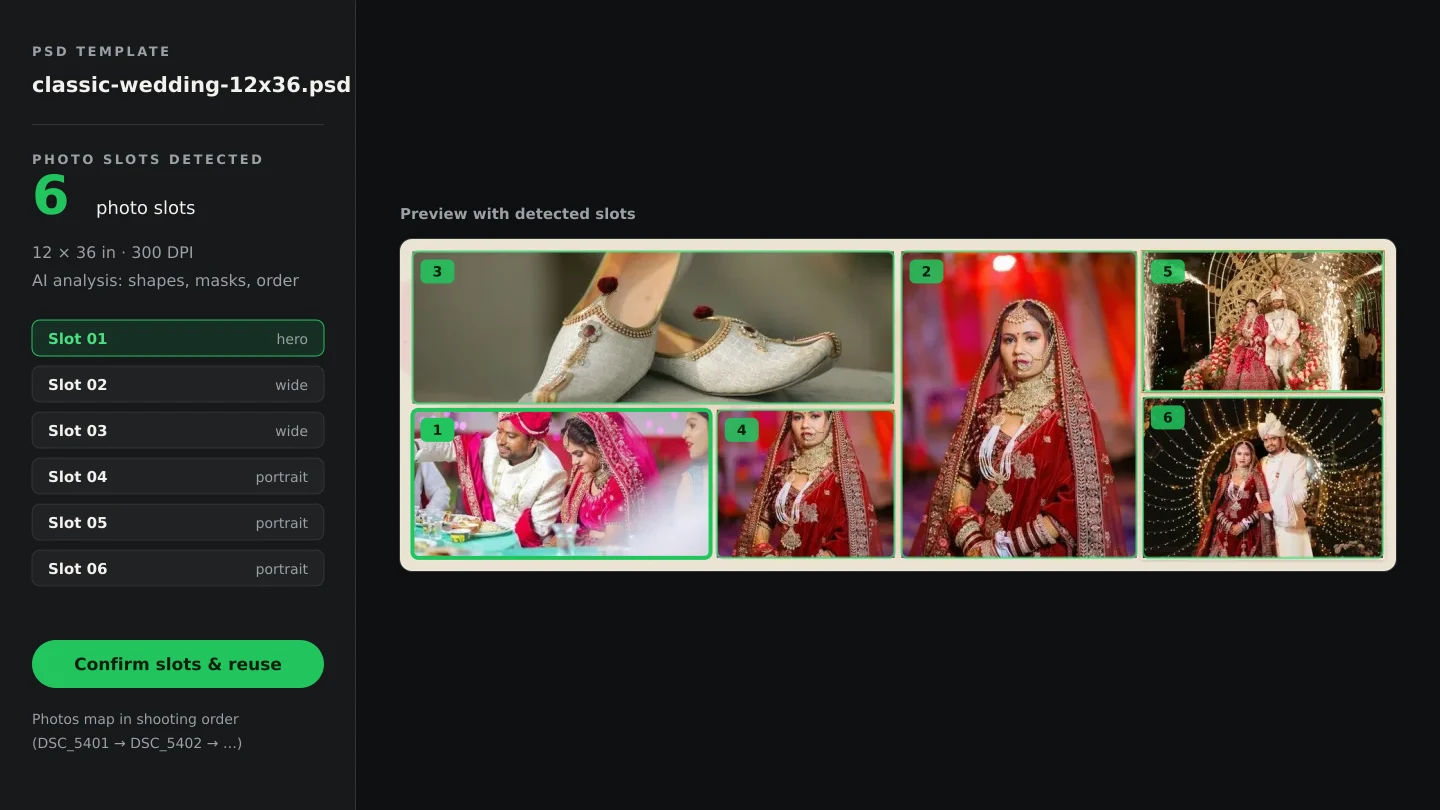
In the Mapping step, click Re-map in order (or Map photos to slots when the album is empty) to place photos into slots 01, 02, … across the sheets in album order — a toast confirms Photos mapped to slots in album order. Fix individual frames by dragging one slot onto another to swap, using the row's — Empty — select, or the Select from gallery or upload button. The Not placed (N) tray shows leftovers, and the mapping is rebuilt automatically when the selection, order or template changes.
What You Need
- An album project with photos chosen and a template with confirmed slots.
- The photos in a sensible album order (set in
Sequence & album order). - The plan from the template step — sheets, slots per sheet, photo count.
What mapping actually decides
Mapping is the join between your photos and the design: every slot gets a photo ID, and the sheet renders from that assignment. The default rule is deliberately boring — photos fill slot 01, 02, 03 … of sheet 1, then continue on sheet 2, in album order — because predictable beats clever when a couple swaps a portrait later. Manual corrections are preserved on top of that order until you rebuild.
Step by step
- 1
Map the album
With no mapping yet, a No mapping yet callout offers
Map photos to slots. On an existing album useRe-map in orderin the toolbar — both run the same ordered fill and toast Photos mapped to slots in album order. - 2
Read the sheet chips
Each sheet button shows its filled count, for example
Sheet 1 6/8— six of eight slots taken. Click a chip to move between sheets; the canvas and the table below follow. - 3
Inspect the table
The
Slot/Photo/Seq.table lists every frame. ThePhotocell is a select:— Empty —removes the photo, and a photo that already sits elsewhere appears with a(swap)suffix. Each row also carries the fit select (Fill/Whole),Adjust crop, andSelect from gallery or uploadto choose a different frame for that slot. - 4
Swap by dragging
Drag a photo from one slot onto another to exchange them, or drag it onto a sheet button to move it off the sheet. The canvas hint says it plainly: Drag a photo onto another slot to swap them, or onto a sheet button to move it off the sheet.
- 5
Handle the leftovers
Photos with no slot collect under
Not placed (N)— drop here to remove from a slot. When everything is in a frame the tray reads Every selected photo is placed. Need more?Add more photos (gallery or upload)opens the picker; new photos appear inNot placedfor you to place. - 6
Go deeper when needed
Open this sheet in the editortakes the current sheet into the album editor for crop, position and layer-level fixes that mapping can't express.
Warnings you should not skip
- A yellow marker on a row — Low resolution for this slot (N ppi) — means that photo will print soft in that frame. Replace it from the row's picker.
- The badge N photo(s) below 200 ppi in the album totals them across every sheet.
- A duplicate placement is a hard blocker at export: A photo is placed in more than one slot. Fix the mapping first.
- Empty slots are allowed — they keep the template's placeholder artwork — but the export warns you before generating.
Tips
- Rebuild once right after fixing
Sequence & album order, then make only the swaps that matter — a rebuild wipes manual corrections. - Work sheet by sheet using the chips: fill order, check the preview of that sheet, move on.
- Swap rather than re-pick when two frames are simply in the wrong slots; dragging is faster than the dialog.
- Clear low-ppi assignments early — replacing a soft photo costs a second now and a reprint later.
Common Mistakes
Rebuilding after careful manual swaps
Rebuild replaces manual corrections with the plain order. Do your edits after the last rebuild, not before.
Leaving a duplicate placement
Pick the same photo twice via the row select and export refuses. The
(swap)suffix is the tell — pick a different frame.Filling slots with the smallest source photos
Watch the ppi warnings: a thumbnail in a hero frame prints worse than an empty slot would.
Ignoring the tray
Not placedis where stragglers wait. If it isn't empty, part of your selection never made it into the book.
Frequently Asked Questions
Can I map photos automatically and still edit one slot?
Yes — Re-map in order gives the base, then change individual rows with the select, drag-swap or the gallery picker.
What does `Seq.` mean in the table?
The photo's position in the album order used for mapping — the same order shown in Sequence & album order.
Why did my manual edits disappear?
A rebuild was triggered by a selection, order or template change. Rebuilds are documented as replacing manual corrections — redo them afterwards.
Can I map without a template?
No — mapping needs confirmed photo slots. Templates without them link to Review slots; see analyze PSD template slots.
Related Guides
- How to Choose Photos for an AlbumPick the photos that go into the book: use client picks and folder filters in Album Studio's photo picker, and decide how many frames a sheet can hold.
- How PSD Template Slots Are AnalyzedUnderstand how Smart Photo Selection reads a layered PSD and detects its photo slots: analysis stages, confidence levels, and how to confirm or correct each slot.
- How Album Automation WorksUnderstand Album Automation: booking photos are read in sequence and mapped into the verified slots of your PSD design, sheet by sheet, for export.
- How to Generate Album SheetsRender the album into print files: pick JPG, PNG, Layered PSD, TIFF, PDF or WebP, pass the preflight checks, watch the job run, and download the sheets.
Related Features
Further Reading
- From Selected Photos to a Finished AlbumTurn a couple's submitted selection into printable album sheets: create the project, choose the photos, generate, review, edit and export at full size.
- How AI Chooses Photos and Album LayoutsWhat Smart Photo Selection's AI measures — sharpness, exposure, faces, orientation and duplicates — and how those signals become a hero photo and a balanced spread.
- What Is Wedding Album Automation?Wedding album automation explained: upload a PSD template once, confirm the photo slots, and map every wedding's photos into finished sheets automatically.
Try It in Smart Photo Selection
Open Album Studio with a photographer account, pick a booking and follow the steps above on your own photos.