Smart Photo Selection guide
How PSD Template Slots Are Analyzed
Understand how Smart Photo Selection reads a layered PSD and detects its photo slots: analysis stages, confidence levels, and how to confirm or correct each slot.
By Smart Photo Selection TeamUpdated Published 5 min read
Short answer
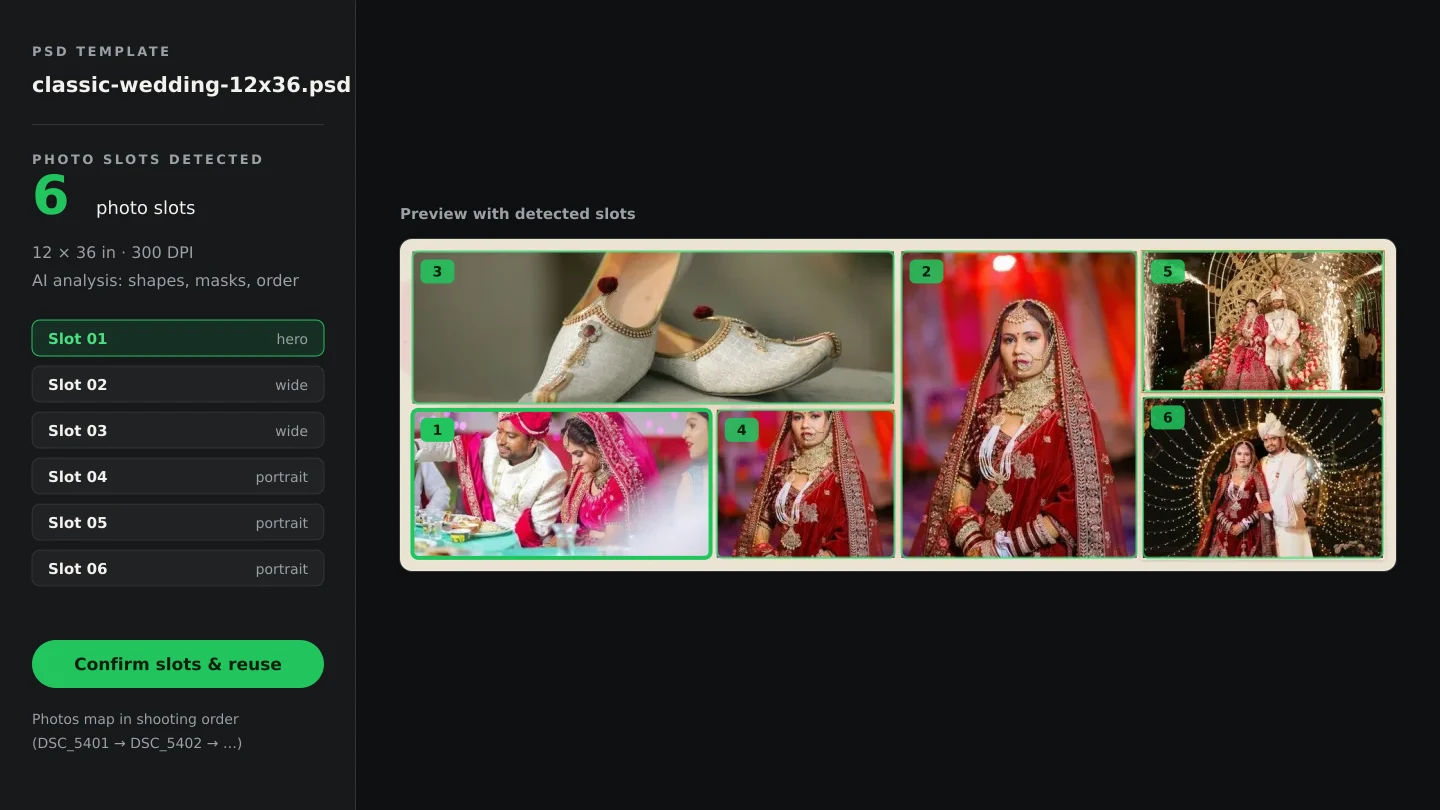
Upload a layered RGB 8-bit PSD. Smart Photo Selection runs Reading PSD → Checking PSD (format, size, colour mode) → Analysing layers → Detecting photo slots → Preparing slot masks → Saving template → Template ready, then opens Verify photo slots. Each detected rectangle is listed as Slot 01, Not a slot or pending, with a confidence of High confidence / confirmed, Medium — please check or Low — likely not a slot. Confirm, fix and press Confirm & save template; the template is then reusable without re-analysing.
What You Need
- A layered Photoshop file: RGB, 8-bit, with photo frames on their own layers or groups.
- Album Studio access (
/album-studio/templates). - The design's intended slot count, so you can sanity-check the detection.
What the analyzer is looking for
Automation places photos only where it is sure a photo belongs. During upload, Smart Photo Selection walks the layer tree and looks for rectangles that behave like photo frames: a layer or group whose bounds are a filled or masked area big enough to hold an image, usually named or grouped like photo 1, slot, frame or sitting above a matching clipping area. Each candidate becomes a slot rectangle with a layer path, a page, and a confidence score. Decorative rectangles, text boxes and borders are expected to be rejected — which is why your review matters.
The analysis stages
- 1
Reading PSD
The file opens and its document tree is parsed. A non-Photoshop file is refused with Choose a Photoshop .psd file.
- 2
Checking PSD (format, size, colour mode)
Format, dimensions and colour mode are validated against what the album pipeline expects; problems surface as warnings on the review page.
- 3
Analysing layers
Layers and groups are walked for frame-shaped candidates — the slowest stage on a heavy, many-layered PSD.
- 4
Detecting photo slots
Candidates are converted to slot rectangles, ordered, and scored: high confidence means the layer's shape and naming clearly indicate a photo frame.
- 5
Preparing slot masks
Each confirmed slot gets a mask so
Fill slot (crop)can crop to the frame's exact ratio without stretching. - 6
Saving template · Template ready
The template, its slots and its merged preview are stored for your studio. You land on
Verify photo slotsif anything still needs a human.
Reviewing the result
The review page opens with Verify photo slots and the count: Detected photo slots: N. Check every slot below — only confirmed slots receive photos. The design preview shows numbered markers over each rectangle; Slots (N confirmed) lists them as Slot 01, Slot 02 …, and a row you disagree with switches to Not a slot (the row's label itself flips between Photo slot and Not a slot). The colour legend grades what you are looking at:
- High confidence / confirmed — green; the analyzer is sure. Still worth a glance.
- Medium — please check — amber; a plausible frame with weak cues. Confirm or disable it.
- Low — likely not a slot — red; probably decoration. Disable it unless it really holds a photo.
Selecting a slot fills the inspector: Layer: (its path in the PSD), Page / sheet:, Position: (x, y px), Size: (px and inches), Aspect ratio: (plus landscape or portrait), and Confidence:. Those numbers tell you whether the rectangle matches the frame you designed.
Fixing and finishing
- 1
Add what was missed
Click
Add slot— the button becomesDrag on the design…— and drag a rectangle over the frame. Too small a drag errors with Draw a larger rectangle for the slot. - 2
Set the metadata
Name it under
Template name, pick itsCategory, and decideRepeat for more sheets: on when the same design should paginate a long album, off for sheet-specific work such as a cover — you will be asked what to do instead. - 3
Check the document facts
The details panel reads
Album size,Resolution,Canvas,Colour,Profile,Layers,PagesandMerged image(From Photoshop or Rebuilt from layers) — a quick way to catch a 150 DPI or wrong-size PSD before printing. - 4
Save it as verified
Press
Confirm & save template(orSave changesif it was already verified). Success says Template verified and saved. It can now be reused for any album. The page then shows Verified — used without re-analysing the PSD.
Tips
- Name your photo layers in Photoshop (photo 1, slot-02) before exporting — naming is the cheapest accuracy boost detection gets.
- Disable every red slot. An over-eager slot steals a photo from a real frame later.
- Compare
Aspect ratiowith the frames you designed; a mismatched ratio means the rectangle includes padding you didn't intend. - Verify once per design. After that the template opens instantly in every flow.
Common Mistakes
Saving without checking amber slots
Medium-confidence slots often include decorative panels. Confirm or disable each one — the legend exists because detection is probabilistic.
Uploading a flattened JPEG-in-PSD
With no layer tree there are no frames to find. Keep layers intact — see upload a PSD album template.
Wrong DPI passes unnoticed
Read
Resolutionbefore saving; a 150 DPI spread prints soft no matter how good the photos are.Turning `Repeat for more sheets` off by accident
Without it the design can't paginate a long album. Leave it on for standard spreads.
Frequently Asked Questions
Can I re-run the analysis later?
Re-uploading re-analyses the file; existing verified templates are otherwise used as-is — Verified — used without re-analysing the PSD.
Why does a slot sit over my text?
Detection can mistake a large text block for a frame. Switch that row to Not a slot so automation never drops a photo on your typography.
How many slots can a template have?
Whatever the design contains — the page shows Slots (N confirmed) and the subtitle tracks the enabled count.
Does verification change my PSD file?
No. The original upload is read only; the slots, masks and preview are stored separately as the template record.
Related Guides
- How to Upload and Use Your Own PSD Album TemplateUpload a PSD album design to Smart Photo Selection, verify the detected photo slots, set the fill order and reuse the template for every wedding, with automatic photo mapping.
- How to Choose an Album TemplatePick the right layout for a book: browse system templates, search your own PSDs, filter by photos per sheet and size, and start it with AI or the manual editor.
- How to Map Photos to Template SlotsPlace every chosen photo into the right frame: how the mapping step fills slots in album order, swaps and replaces frames, and catches low-resolution photos.
- How Album Automation WorksUnderstand Album Automation: booking photos are read in sequence and mapped into the verified slots of your PSD design, sheet by sheet, for export.
Related Features
Further Reading
- What Is Wedding Album Automation?Wedding album automation explained: upload a PSD template once, confirm the photo slots, and map every wedding's photos into finished sheets automatically.
- How AI Chooses Photos and Album LayoutsWhat Smart Photo Selection's AI measures — sharpness, exposure, faces, orientation and duplicates — and how those signals become a hero photo and a balanced spread.
- AI Wedding Album Design: The Complete GuideHow AI wedding album design works, what it does well, where you still decide, and a practical workflow from photo selection to print-ready export.
Try It in Smart Photo Selection
Open Album Studio with a photographer account, pick a booking and follow the steps above on your own photos.